Friday, December 16, 2011

My pretty sneakers


A few weeks ago I bought these plain white sneakers for $6. They were a bit boring so I decided to paint them. I had been wanting to do this for a long time but hadn't found the right pair for it.

I used a black sharpie pen ($2), a soft pink sharpie pen (only available in mini) ($0.50) and some green fabric paint ($3).

Searched the web for embroidery designs and found this pretty bird by Magda K. Designs (couldn't finde the website again). The rest are just doodles I freehanded.

I traced the design with a pencil and then went over it with the sharpies and paint.

This is the finished product:


Tuesday, December 13, 2011

The infamous cake pops


 Cake pops are a fun thing to offer guests at parties, I mean, who doesn't love cake... on a stick. However, when you have a room temperature of 35 Cº things can get really messy.


For my niece's birthday party cakepops we used our own and fabulous vanilla cake recipe and added some pink food coloring.

We let the cake cool off and then (my sister loved this part) mashed it into little bits.


Mixed the mashed cake with my favourite vanilla frosting and formed little cake ball.


 Now, since it's almost summer here and that means over 30 Cº, the mix started "melting" before we could make the balls so I suggest putting the frosting on the freezer before you mix it in.

My sister didn't have time to cover it with white chocolate as she had planned so we just dipped them on thin royal icing.

because of the heat the balls kept falling off and everything looked kinda messy but the taste was great and everyone loved them.


Now for the recipe:

Easy no-mess Vanilla Cake.

Ingredients:


3 cups of sifted all purpose flour
3 teaspoons of baking powder
1 ½ cup of sugar
3 eggs (at room temperature)
1 cup of milk
1 tablespoon of vanilla extract (or lemon zest if you prefer)
2 tablespoons of butter

Pre-heat oven.
Mix dry ingredients together in a bowl.
In another bowl mix butter and sugar together, add eggs one by one. Wait until every ingredients has been fully blended in before adding the next one. 
Add the dry ingredients half a cup at a time, pouring the milk alternately.
Put the mix on the baking pan and bake on low temp for about 20 minutes or until you can put a wooden stick in it and it comes out dry.  
Miracle Pan-Release
Okay this is not my recipe buy the original from Apron of Grace  has dissapeared.
Just mix:
½ cup of flour
½ cup of vegetable oil 
½ cup of shortening

Just spread it on your cake pan and bake! Keep ot on a air tight jar on the fridge.

For the Frosting I used Magnolia's Vanilla Buttercream Frosting.
The icing was made of only (a lot of) powdered sugar and (a bit of) water.
Enjoy!

Monday, December 12, 2011

Cocadas


 As I mentioned on my last post, for my niece's birthday party we had the kids decorate their own cocadas.

Cocadas are balls made out of different ingredients, often covered with coconut shavings (hence the name "cocadas").

You need a dry ingredient as a base, a sticky ingredient, a fruit and toppings to cover it.

For my niece's birthday we made vanilla cookies, manjar (dulce de leche) and a smashed banana. Mix it all together to form a dough and roll it into balls.

The kids chose the toppings, in this case chocolate and rainbow sprinkles and royal icing.


My favourite recipe however is oatmeal, condensed milk and smashed strawberries for the mix, covered with powdered sugar.

You can try many combinations. My boyfriend once made manjar, oatmeal and kiwi cocadas. They were a hit!


For a birthday activity you can also let the kids make their own ball and cover it with chocolate (this is what my 11 year old brother did with his cocadas).

Enjoy!

Sunday, December 11, 2011

Pink birthday party


Hello!

Last saturday we had a party for my 4 year old niece's birthday. It was a lot of work because this was the first time my sister threw a party for her. Everything was great, guests had a really good time and Liliana, my niece, was ecstatic.


For the activities kids decorated vanilla cookies and cocadas with royal icing and sprinkles. They also could paint and draw on white canvases.

For food, besides traditional party food, such as chips, peanuts and cheetos we served mini cupcakes, marshmallows and fruit with a chocolate fountain, and cakepops.

The birthday cake was chocolate cake, with chocolate/manjar filling and Italian meringue on top. It had sugar paste flowers.

More pics on my flickr.

Thursday, December 8, 2011

Felt moustache pacifier

It has been a lot harder to get myself to sit and blog. Today I wanted to share a funny picture of my baby boy Diego. He's three months old and you can see him here with his felt moustache.

Nothing fancy, just a piece of brown felt hot glued to his pacifier. I plan on making different kinds of 'staches for him.

If you wish to try yourself you can find inspiration for diferent moustaches here.


Tuesday, November 29, 2011

Easy DIY sensory burp cloth


A few months ago, while I was still pregnant, I saw on TV a girl selling sensory burp cloths, they looked something like this:
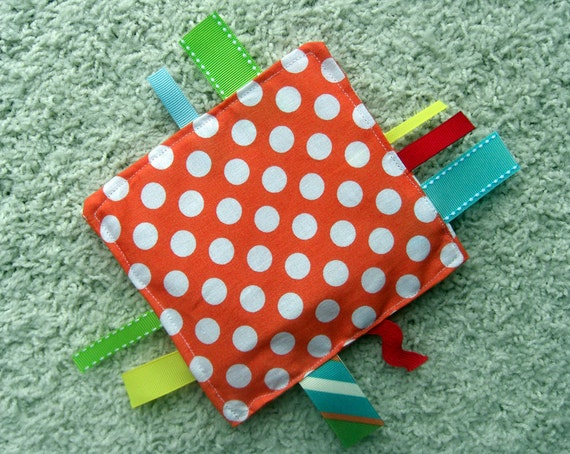
This is what a cute sensory burp cloth looks like
Here in Chile they are very overpriced (I can't afford 10$ burp cloths), if I buy them online I have to pay shipping fees and I don't like paying for stuff I can make myself so I decided to give it a try.
I can't sew to save my life so aesthetically my results are very poor, however the cloth serves its purpose and I like it very much.

If crafts aren't your thing, you can buy a handmade one on etsy:


But if you would like to DIY it's actually very simple and I bet your sensory burp cloth turns out even better than mine.

Materials:
  • 1 Burp cloth or blanket. 
  • Different scraps of fabric, ribbon and yarn. The idea is to get different colors and textures.
  • Plastic bag. I has to make a crunch sound when touched, kinda like cellophane.
  • Plastic bottle cap. I used a wide and flat one.
  • Felt. I cut a circle big enough to cover the bottle cap (with seam allowance), a rectangle big enough to fit my baby's name and in the letter I needed to spell it. 
  • Small Beads
  • 4 bells
Instructions:

1. As a base I used a small white burp cloth and attached the different scraps around the border. I used:
- Black burlap.
- White ribbon.
- Soft pink silky yarn that I knitted into a square.
- Strands of bright purple yarn.
- Blue "hairy" yarn that I crocheted so I doesn't break.
- Green fleece from an old blanket.
- Soft yellow fabric (I think it's nylon)
- "Yolk" yellow yarn that I crocheted into a ball and chain. I put 2 of the bells here.
- Orange yarn crocheted into a ball and chain. 2 more bells here.
- Red fabric
- Brown ribbon

2. Put a few beads on the bottle cap and turn it upside down on top of the cloth, being careful not to let the beads go.  Sew the circle on top of it.

3. Sew or glue the letters on the rectangle. Fold the bag and sew the felt rectangle on top of it.

And that's all! You may add more scraps or materials and different textures to the burp cloth.

Sunday, November 20, 2011

About me

Hi!

I'm a new blogger and here's some info in case you want to get to know me.

My name is Maria Sosa. I'm 24 years old and I have a 3 months old son named Diego Antonio. I was born in La Habana, Cuba and currently reside in Santiago de Chile. I have also lived in Vancouver, Canada.

I'm about to graduate as a Clinical Psychologist and I live with my partner, Rafael, who's an Antropologist.

I love to read, spend time with my family, crafts, trying to cook, listening to music, watching tv series, movies and of course, dancing.

I started this blog as a means of pushing myself to fully intake everyday experiences as well as motivating me to put in action the many ideas in my mind.

Enjoy!